Somehow mastering vocals in FL Studio is dead easy. But belief you are limited by logic, you will create somehow a problem for yourself. You have to go out of the limit you are perhaps thinking is applicable, maybe compressor gain limit? There is nearly no limit on how low the volume of your vocals might be that you can certainly increase the volume of your vocals at an extremely high level. That means that with Maximus PRE gain. You get around 15dB gain. The option is to either use a compressor gain, rather than compressing.
Remember to first denoise your vocals properly:
https://www.loopswag.com/fl-studio-tutorials/how-to-denoise/
Apply this structure for your vocals:
Fruity Limiter: “Use the Gain,” remember to use Fruity Limiter default preset! As well for Maximus, but Maximus might be more powerful since you can make a curved soft clip compression.

You might need to check with the bands if they do not clip your sound. If the volume of vocals is above 0dB. As perhaps here with the Fruity Limiter. IF that happens, you need to increase the “CEIL” to open up for more space of sound without compression or hard clip.
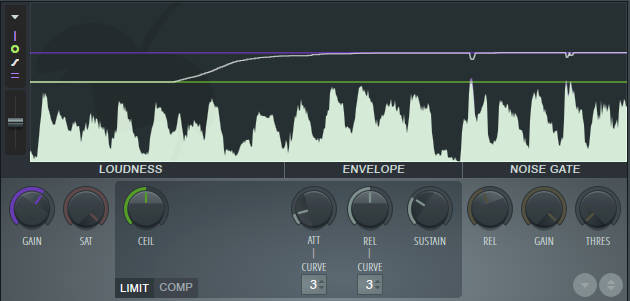
We recommend Maximus for vocals as the compressor nearly has better gain propulsion.
By editing vocals, try adding some different Eq solutions:
Eq -6dB from start to around 1000Hz. You can do as slowly to even just 350Hz. Most of the frequencies from 100-1000Hz have resonance, which is sound above the amplitude. You might hear it on systems that record wrongly, or sound is processed with being pitched up, like bass playing as vocals.
But most times, a vocal needs to be lowered at these frequencies. Because of Resonance. Thus be reducing levels; you can decrease the level of resonance if you can hear it? Perhaps a low impedance speaker and the authentic sound card might often give resonance sound, which then can, in some cases, give unpleasant listening. But in the course of that, while reducing levels of sound, you as well reduce the noise in the recording. Perhaps you would reduce static or white noise at lower you vocals so long back, and then backing them up into higher sounding level.
But the idea of “limiter gain eq limiter gain” will cause these levels more stable if they are noise, but first resonance removal is needed. And the reduction of these levels can overall be gained up again. The more you reduce these levels, the less harsh they will sound after a gain. And often, the noise is just resonance, an unpleasant capacity of vocals. But that’s not all; there are several things to take into consideration as well as shh sound on your vocals and the air.
If you are not correctly working on Parametric Eq 2, you can choose to use TDR SlickEQ “unique VST” to remove 224Hz center resonance for about -6dB to even -9dB. Often a high level of 100-1000Hz is a wrong sounding level and measure that by how much your vocals lose in power and how much noise you remove.
We genuinely want the essential parts of the vocals to stay playing at a higher level; we are talking about 1000-3000Hz to even 18000Hz. So we often do this process two times in a track to reduce the harsh feel of bass to the vocals.
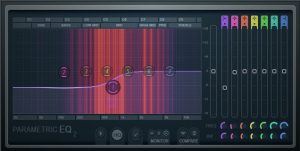
To avoid your vocals to play with basses, put on a 40Hz cut preset with Parametric Eq 2, and drag it to your lowest sounding bass level. To avoid problems with vocals playing with any bass. Often do check the monitoring, and it’s essential not to cut the higher frequencies. You might see the density of the vocals is just up to 5kHz. We will teach you how to attain more than 4kHz levels later in this tutorial.
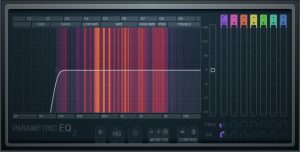
Now you need to set your s letters and f letters, causing shh words to sound in better shape. That way you need to fix it at this proportion;
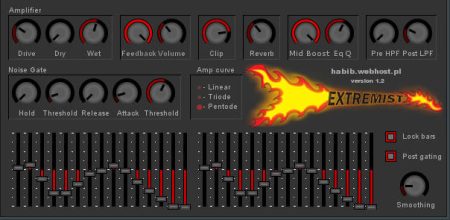
Use Maximus Compression of the high frequencies and on High-Frequency band set your cut like the envelope in the picture. Rember to make it soft clipping, so you avoid distortion: And Turn always off 20Hz LOW CUT:

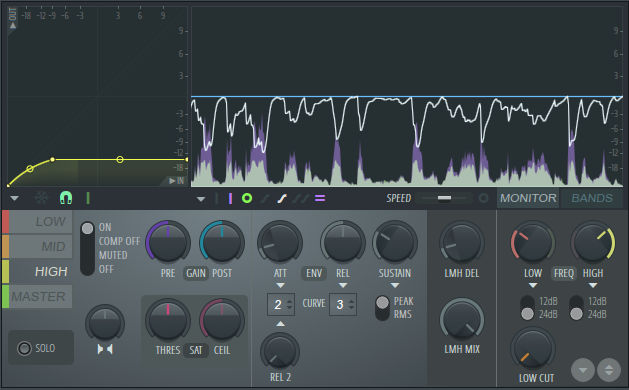
Important Tip: You might want to get an addition of more leveled levels of your S letter, so set as of example BANDS in Maximus to around 2kHz of the high frequencies “bands”! Most people sing higher frequencies, but some have bassy vocals, and you need to set the bands to around 2kHz. These 2kHz levels are by SPITFISH not fixed since it only uses 4kHz levels. So Maximus might be the best solution to this.
Tip: You can use the SAT – CEIL. And drag the CEIL down to the vocals loudest part, and avoid using curved compression. Sometimes it might be more convenient and more accessible to perform than a soft clip, but CEIL has already specific hard clip in it.
Deessing is essential for your music, as it can sound harsh to anyone, as high frequency creates problems to mostly all listeners, and that avoids one listener to listen to your track. Often it’s the most important thing to your music since you will end up having more complaints than vows. The importance of this is more than any other process you do to vocals. And it might be the most important thing to do for all musicians.
Now you might want to use a plugin that is not in the collection if you still have s letter problems:
But after removal of the frequencies as compression with Maximus, you can slightly than after the Maximus reduce about 2 to even 4 dB of your most hitting shh tss letters with Parametric EQ 2. But be careful since you are removing precious frequencies that often are more vital when they are not becoming harsh levels. In Parametric EQ 2, you might see dense colorization of the words for yourself to reduce more of the problematic sounding levels on nearly all recordings. Normalizing certain sounds can, of course, work.
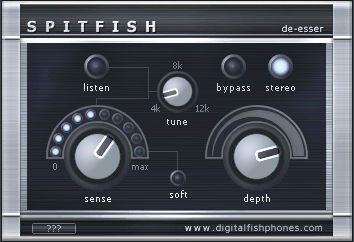
Use a plugin called SPITFISH: Download: SPITFISH at loopswag.com 500kb
Remember to set SPITFISH to Stereo – Then Gain sense at 4k with a depth not too hard to avoid many problems as removing too many high frequencies. If you have a higher level of frequencies by the vocals, you might need to set the tune to 8k or even 12k. But most even have at 4k. Sense needs actually to be higher, and depth needs to be lower, the higher the intensity, the more senior removal of higher frequencies will occur, and your vocals might sound empty.
TIP: The more sense is better than, the more depth you use with SPITFISH.
Important notice: Remember that your sound needs to be under 0dB to use Spitfish, or else you get super problems! Like distortion as well. Remember that as often is required to know if you do a remastering to a track, then limiting will occur to the track. But you can use simple Fruity Soft Clipper to make your vocals 0dB, and you might then use SPITFISH as the next plugin. But remember to compress correctly, and soft clipper is a compressor, you might always want to check if Maximus is soft clipping as well on either of the bands.
Now you might want to turn your vocals lighter up around 1000Hz-3000Hz as well as gaining more frequencies using a tool called ModernDeepPurple, which works perfectly for mastering as well vocals. For those who master tracks, its indeed the right solution for the track to make vocals more present.
As you can gain up with the mid GAIN2 to get a decent gain of vocals. You can as well use gaining with Parametric EQ 2 of around 1dB up around specific of vocals 1000-3000Hz. But often it can cause a bigger problem than the clean increase deep purple does.

So you set Q lower most times when gaining, And High Q when lowering the sound!
Q is the range.
Download: ModernDeepPurple at loopswag.com 1.5mb
Now you can try affecting the properties of Stereo by putting on a Hibert out with this plugin below called Frequency Shifter; for your vocals to sound more stereo, but it is advised to check the quality it delivers. Otherwise, you might want to turn the process down using the handler to the right of the input level of the plugin as in all plugins like volume button:
“Using Hibert out might cause a different problem to your vocals, and it is only advised to use if specific your vocals might sound good with the option.” If you use reverb, you might not need this processing. But it anyway does make the sound go out from mid frequencies to the side frequencies.”
Another thing that can perhaps be used rather than Frequency Shifter is probably Stereo Shaper. But our best offer would be using CS12 with mid and side gainer. Your vocals might not have any side frequencies unless you use reverb. So you can as well use CS12 to increase doubling or widening of your vocals at the bottom left side in the plugin.
Download CS12: CS12 at loopswag.com
Tip with this knob of plugin mix is to set it to 50% to even 25%:
![]()
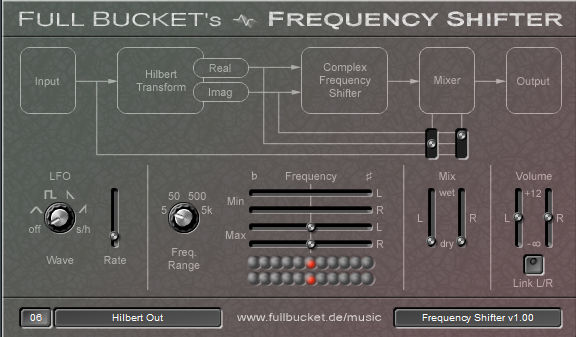
That makes vocals anyway Stereo flipped cool, but often it’s wrong, but be aware how you do it!
Download: freqshifter64 at loopswag.com 500kb
Now you should edit your vocals somehow with more EQ? Since EQ is the most important thing and then gain as well, you will, at most times, attain studio recording if you process your vocals accordingly, doing everything right. Always as well remember the sequence of effects that you use, some need to be first some last. And processing with too many plugins might end up in problems. Remember EQ first, then a gain, at last, you put on the compression of the vocals, to maybe around -6dB with a soft clip envelope.
Anyway, you might want to use different solutions for stereo feel. Stereo Shaper can somehow change the delay of the vocals of the right or left side, not always that that is the right solution. But it can hit the difference of stereo field and your placement of your vocal. Stereo tools often aren’t the best solution unless you do stick to a reverb solution.
You might go dead down to doing different fresh processing for your vocals – Therefore we have packed two plugins called SQEncode and QSEncode:
Download: QSEncodeSQEncode at LoopSwag.com
You might want to set them to around as in the picture to mix level of 10%:
![]()
That is a different option if freqshifter isn’t working for you!
The ultimate solution to make your vocals more relaxed and broader? Well, you wouldn’t want them wide out of the headphone as being too wide. Always remember to go back to listening with a fresh ear, you often need a rest when producing music, and your ears might start to lose the ability to hear right, as well you might be exhausted and start to bore yourself, so you look after the fastest way to do things.
That way, you get more comfortable to set the vocals in the right stereo feel. But not always this is even the best. There are tools like WIDE and Channel by Terry West you might look into if you look for more depth to widening, and it is at all times not necessary. Still, you might attain a cool effect, which can be simplified if you look after uniqueness to your vocals, making them sound more different than all the other producers, then maybe it might be. But you can as well make two vocals sounding together in as a choir or double-takes, which then sound together with them more perfect; maybe then this process would be suitable for one of the singers?
A perfect tip for your recording is to use as little as possible the power of any effects that can be as above. By the mix level of the plugin. That way, you can change the effect proposition for your vocals. With the mix button to the right of each plugin you use. It is something that I’ve once called input-output throughput. Throughput is the end effect of the mixing, making it different mixing and certainly giving very unlogic processing for most using the process. But its the best FL Studio has to offer besides other DAW’s.
The perfect tip: Is to use your hand around the microphone head if you got a dynamic microphone to record less reverb. As well as some socks for your microphone to avoid noise from computer fan or more reverb sound to sit with your recording. That ensures maybe a better solution than a condenser. The higher the impedance of the microphone, the less resonance it will record. You are making it actually into a better quality recording. Newer dynamic microphones surely are low impedance, creating more problems, but the recording will be in low volume with high impedance.
Since recording with a dynamic microphone is possible, it will get studio quality at the end if you are always trying out new experiments and procedures to learn yourself, and one technique is learned after 1 million faults! But when vocals are lacking frequencies above 4kHz, with many specific bad microphones, since some record with the phone, some even get to low input of the frequencies that are from 5kHz higher. Therefore you might need to use plugins that can enhance the higher frequencies by something called excitement. There have been made plugins for that by Terry West but are not long that available; there is different processing to use Antress plugins to mask more frequencies out in the progression. You might want to seek unlogic treatment for your vocals, but then again get several higher frequency levels, even on an mp3.
Download all Antress Plugins: ModernFullPack at loopswag.com
Terry West plugins that excite the high frequencies are called CS4 and CS12-M; these plugins will most often create masking of higher frequencies, making them sound stronger in the higher frequencies.
Download: CS4 & CS12M at loopswag.com
By ModernPlugins, you get certain plugins as perhaps ModernAphopis, which give masking, which masks the higher frequencies into new frequencies, excitement might as well be excitement. And the plugin called ModernLostAngel can set your higher frequencies into life by gaining them in additional.
Tip with Maximus: Set your vocal as a curve with the green envelope to edit it as a curve. That way, you achieve a soft clip on your vocals. If your vocal is distorted, it will somehow make it less distorted. But that’s not the most important thing. It will gain your vocals with the PRE option to increase with. As you see, this vocal has gained much more than specific. And plays to around -6dB.
The envelope is needed to be set to around -6dB between 3- and -6, and then most likely, your vocals will be around -6dB in height as of sound level as you achieve a curved envelope to around -6dB. That is enough for a track, and you might not need higher levels with vocals as of FL 12 and FL 20. With FL 11, you still would need 0dB vocals. That is the processing difference with newer DAW. And surely FL 20 is the best.
Your vocals don’t often need to be more than -6dB on your track. If they do, your levels of the track are too high. Setting lower levels of mid is often a good thing in your instrumental. But having your vocals in the project, you might get problem tweaking mid frequencies on the master. So your vocals can be gained by reduction of no problematic way “hard clip” “limit of a plugin as SPITFISH.”
Remember to turn off the LOW CUT. It has wrong processing as it creates a compression problem.
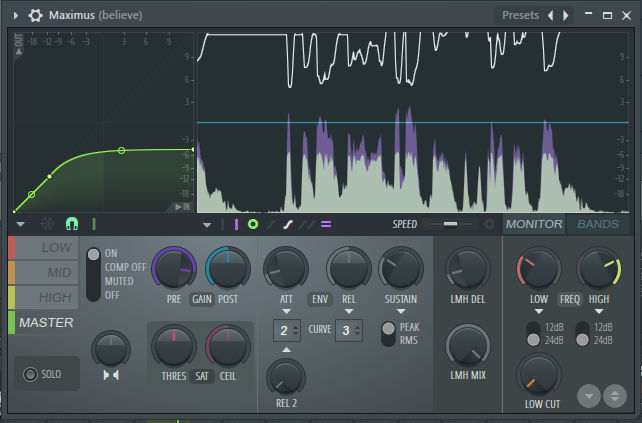
So, by all means, you need to compress your vocals as the above option, to avoid the low sounding levels to be sounding low. If you have perfect sound levels of your vocals, then a higher level of compression is not always needed. That compression to around -6dB is the most essential as the last part of your vocals in the mixer, and you should use this as an ending option.
You can as well use Maximus to gain with rather than with Limiter, but then again, you need to EQ down your levels more and later get them back to gain. Sometimes a reduction will reduce certain levels of your vocals. Most likely, you do not want to minimize 1000-3000Hz of your vocals. As these levels are 100% clean mostly in all recordings, and if you do a record with Hard Clipping, they surely will sound distorted. If they do not, most often, they are clean. But often, distortion might be impossible to remove. A distortion reduction plugin called Relife by Terry West might reduce some clipping.
Pro tip: There is an option to clean your vocals more thorough by finding the specific notch level of your vocals. The sound of the bell will describe for you the highest level, and change it to the opposite as the next picture. You will understand this as dragging the handler from left to right to indicate the most upper bell sound level.
“You will have to move at highest level the handler from left to right, looking for a bellish sound.”
Using around 5-10 of these Parametric EQ 2 processings, your vocals will most likely be more cleaned. And will sound more professional. But if your vocals already have its right sound level, this process isn’t that needy. This notch EQ system might work on specific several types of occasions. If you recorded with laptop speakers, are the vocals recorded in a noisy space, are there to much background noise? Then, yes, it may reduce the higher frequency problems that are in the vocals, thus ending up in nearly studio recording; perhaps it anyway would be better than mainstream recording if you knew all the processes on this tutorial.
So, When your recording is just this:

You do not need to normalize the track; sometimes, it will cause distortion. But you can as well with Maximus or Fruity Limiter gain it up to even 0dB with gain and without making the track to sound bad at all, or even cause you any problem, it can become studio recording. But if the gain was even higher, then maybe yes, but several compressors do 60dB gain without any problem. And that is a massive amount of gain. You will have to look after these plugins as they relatively do not create artificial sound, which gain sometimes can give, but Maximus doesn’t do that either. But a choice between Fruity Limiter you might always end up on Maximus. Since you don’t hear, but you feel the artificial sound levels.
The recording does not always need to be -6dB to even 0dB. Try to avoid recording at the highest possible level to prevent your vocals from being distorted by a hard clip.
Though these vocals in the above picture became studio recording in the end, just by the use of Maximus gain, as well as thorough removal with denoise, was done.
There is the magic you can do with the use of intellectual use of gain, which often causes unlogic thinking to become as you make compressor gain. You might believe you are creating a massive increase in noise, but in the end, it does not matter since the gain is specific to even gain 60dB without creating any huge problems for you.
The last tip!:
To reduce the reverb of your recording, you might want to remove certain levels of side frequencies in your recording. But they will become very mono. And sometimes artists fill their vocals with reverb unless the room isn’t acoustic fixed, or unless you don’t hold your hand around the head of the microphone, these vocals often are dead hard to fix. But you need to find these plugins usually, which does change out the side frequencies of the track. That can be either CS12 by Terry West and even ModernMonoizer by Antress. There are still other plugins which can remove Side Frequencies.
The biggest problem you might see with Parametric EQ 2 and Maximus is that they do not display the side frequencies. Why it is that I genuinely don’t know. But it’s a big bug, perhaps. You might try it, turning off the mid frequencies of any sound and process with a high level through them.
The side levels are only imaginary since you can still reduce them with compressor or EQ.
Enjoy producing, comment, and share around if you liked the tutorial. We genuinely believe you did.





2 Comments
Not all with the writers have such type of education so there isn’t a large competition during these sites, which gives a high probability to dedicate yourself highest possible rates. Services Offered by Professional Writers Writers aren’t just tied to composing articles for websites and blogs. For instance, there is the Dark Cloud, Silver Lining cultural pattern of newness.
What’s up colleagues, it’s an enormous post about culture and fully defined, keep it up all the time.