It’s like never before; I became nearly rich so close to the game! 1% of the population now have assets of cryptocurrency. And that means it’s still golden to recruit yourself into an affiliate of this FreeBitco! Since more straightforward, it does not get! I once earned simple 0.01BTC means I went off out with around 120$ from one of my referrals! That was cash, as usual, as always, I played away all my money on the casino. But now, I focus mainly on my motivation to stay away and push my business! But freebitco.io didn’t give me the income…
Author: Swagger
With WonderousBeats, you can produce the illest beats. Check their website for the hottest hits in the market. 9.99$ beats of unique quality and content that will beat your customers out of the game. wonderousbeats.com is also searching for talents who would like to earn 90% of the sales and get the quality and wonder type of finish as same as WonderousBeats. Use contact@wonderousbeats.com to send their information on how to sell beats with them. www.wonderousbeats.com
To pan your instrument or hihats using Stereo Shaper is possible. To get a 3D specific feature of your sound is a way to do it, especially with the stereo matrix. As often, you can automate all four handlers in Stereo Shaper to shape your sound in a specific way throughout in your track. Still, it’s a tedious work for very little income but has a distinct crisp sound that can be interesting to your listeners. Especially for auto-panning. You need to load first the Fruity formula controller: Use the preset called three steps LFO. And edit it little for…
Why is dithering important to your 32bit mix if you want to release or send it to someone 16bit or 24bit and even mp3 of your project? Well, without dithering, it makes the centered dithering in the picture blurry. With option dithering on, it makes the 16bit sound more balanced and in the right shape as it routes the sound cuts to the best level. By sound, you make it into 16bit off 32bit where you cut out 16bits of the track near each another 100th millisecond for tracks that are 16bit. So it’s often essential to use dithering. The…
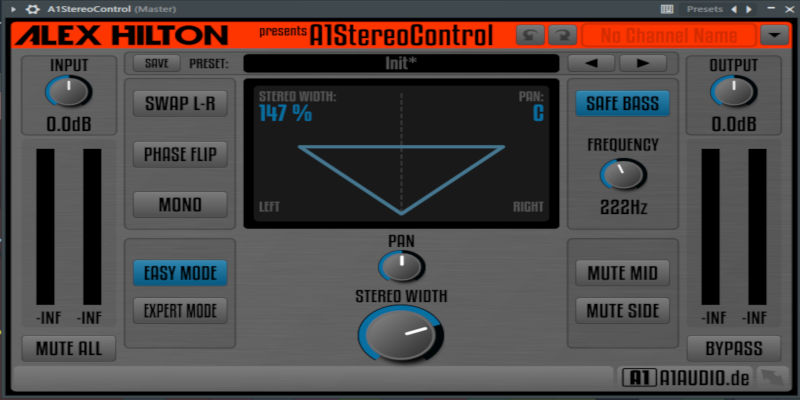
With A1StereoControl, you are enabled to send your sound in a more stereo feel, making it higher class 3D sound. Also, by using this plugin, you might end up with a more beautiful end master of the project; you just put it into the master channel before your limiter or Maximus. Remember to set Safe Bass to around 222Hz or 224Hz. To avoid stereolizing the bass frequencies. By adding in with the widening of up to 150%, it will widen the whole tracks needed frequencies to more stereo. It is a new option and a further need for most tracks.…
To extract your vocals with Knockout, you might be able to withdraw the vocals or sounds out of a beat; it’s easy as following this structure to make knockout functional on a beat and an instrumental. You might need basic things to start up. Download Kn0ck0ut: Kn0ck0ut at loopswag.com By setup, you don’t need many preset changes, but you might need to set Instrumental to the right channel by changing the pan to the right and then sending the sound to a new insert where you put knockout. Then the beat to be left panned and sent to the same…
Here you see how to use Love Philter in another way. You will learn how to sidechain with automation using Love Philter. Its unique capability will let you use it differently: First, you see the envelope as the SAW wave. This envelope is set to VOL as PAT. It has four beats means the beat ends up on the black slope. Set your point right to have the right placement. You can zoom in with the middle mouse wheel. As you might want to differentiate a preset, you can as well make sidechain as shown here: The blue shows you…
Why we recommend this pack is by its piano its horns or churchly sounds. The diversity of the best some could actually get. One of the best plugins you would need for your Trap production. Or beat or anything to even Techno. It has the fresh sounds of wonder that you, dear, to explore. It is ten times better than Nexus because of its 100% 32bit processing. And it’s a synth that creates raw tension of the product. While it used oscillators, you don’t have a sound that is pre-recorded as if in Nexus. To that, you get the same…
Somehow mastering vocals in FL Studio is dead easy. But belief you are limited by logic, you will create somehow a problem for yourself. You have to go out of the limit you are perhaps thinking is applicable, maybe compressor gain limit? There is nearly no limit on how low the volume of your vocals might be that you can certainly increase the volume of your vocals at an extremely high level. That means that with Maximus PRE gain. You get around 15dB gain. The option is to either use a compressor gain, rather than compressing. Remember to first denoise…
You can make your own presets with Sytrus with this guide. You need to know what an envelope is with its basic understanding as ADSR: Attack, Decay, Sustain, Release The easiest to learn is that attack is how high sound first milliseconds a tone is. Decay is for how long the tail is or when the sound ends. For example, an 808 drum has a long decay high attack. The decay can sometimes be a curve of volume going down up to 1 second or longer The envelope you make depends on how the sound is played if you use the…
The master levels through this course will take you closer to digital limits. After several hundreds of projects and several years of production, I have discovered through listening to mostly all equipment possible to know the right levels of any mix, even listening to many different tracks. Some that often play on the radio have a minimum height of sounds and are also going down low as -6dB and even sound properly good. And you feel the bass as the same as 0dB in most of any equipment. But some of this experience is somehow a few times better at…
Firstly we show you how to make the data vocal into a beautiful vocal as this 173kb mp3 playback: Since the vocals have a touch of no monotonicity, meaning it is somehow sung, that is possible with the text to speech and the pitching with Autotalent that is downloadable at the end of the tutorial. First, you add the Bicycle that is in the folder speech in your internal browser. Drag and drop the sample to the playlist. In case it asks you to create, create an example on the playlist. When turning on the stretching of audio that is…
The most essential in your vocal editing is to denoise. After then, you might need different protocols to create the best possible mix with your vocals. Some of you might use Fruity Limiter by opening the Ceil and then achieve a higher gain of vocal. Be aware that having a vocal higher than 0dB some plugins, especially SPITFISH, will have problems. But then again, you can reduce certain levels of your vocals with Equalizers, and it’s needed. Then your vocals might need a stereo feel. It’s not easy. But some plugins in this collection will create for your vocals that…
To make short decay kicks it is all about the envelope you put into use. But as well how long the drum will play, always use the tempo signal and adjust about a maximum of 2 bars in Syrus. But you might want to make them as short as possible, and enough pounding at a short moment, often two bars are used. As perhaps to the minimum length of 1.2 Bars. Often power is hard to achieve at the first hit but as well pounding feel that comes few milliseconds in the hit. First, choose to insert Sytrus into your…
First, you have to cut your beat to be able to stretch the beat: Use the blue tool button cut. Also, set your ceiling to Cell as you see in the middle top. Then cut from top to down on a beat, that is also set to its tempo. Now make the track unique or the sample of your choice so that you can edit it: Double-click on the beat or sample and choose e3 generic or e2 generic since that will make a more authentic sound of the stretch: To be able to stretch the sample you have chopped,…
To be able to gate your breath or something that is noise in your vocal recording. Mostly without the need for chopping, you can use Maximus. You can turn off all bands in the Maximus, and only let Master Channel keep working for you. To be able to gate you need to set the proper Envelope in Maximus: The Cut you see in this Maximus Envelope. That is set to -18dB and is more like a cut of the sounds that go below -18dB. You can set it shorter tho, and even chop the sound more precisely at certain level.…
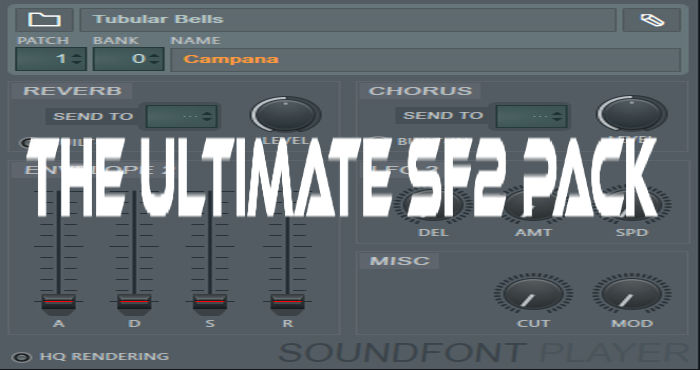
We have a collection of 127 .sf2 files for you to grab from our server. Due to a lack of possible file sharing, we are releasing just the files below 2Mb. Our download buy of 320Mb is now available here: This pack is for Rap, Trap, Emotional Trap, Gansta Trap, Trap in general. For rappers who produce beats. It’s a great arsenal to your producing for any hip-hop beat, even boom-bap. And this adds extra to your infinite production for several years in front. This collection is sure to advance your production in other ways not possible. You can count…
Something better than Nexus and even Hypersonic? Yeah, this is the true arsenal of the ever wanting collection of sounds and features, this collection is only Windows-friendly. They released this kind of set for free for all. Through archive.org. Surely it’s super unique and no one can ever say this is much worser than Nexus. Why not download HG-Fortune Magic Collection from Archives? The whole collection of these PRO versions is available for free by the makers of these plugins. They allowed all plugins to be a free download on the internet. They even release new plugins on their Twitter…
With some loops from Dealazer, while he played on his RS7000. This loop pack consists of loops only. But you might feel the remembrance of music by Mr Oizo. Taking a different step, with the sounds. The whole zipped unique package is available from this site. V. 2.0 will have the samples as loops only, you might come back later in the next weeks for the loop collection from this package. But as far, it’s possible to make a decent own track out of this loop collection. It has 15 loop samples. FLP is for FL11+ Download: Ozzydata at loopswag.com…
FL 10 or 11 and FL 12 Have different procedures on how to use VST plugins. But it’s nearly the same. First, you need to choose the right options to change to the appropriate folder; Then change the VST plugins extra search folder to your collection of .dll files; With any installation setup.exe, it can be your VST plugins folder. In FL 12 it’s different, but it’s the same option; You need to assign your paths; with FL 12, you can use more different VST folders paths. For new or old VST plugins, making a search for a plugin easier…
You might want to add in a Formula Controller. “It’s easier to use in FL12” But since it’s nearly the same and easier for FL11 users, we have written this for all to understand. On any synth, put your stereo shaper into a mixer unit. Then choose the red mid handler first by right-clicking on it and Link to Controller by right-clicking. Then you will see a more likely screen like this: Try to assign “Internal Controller” for Formula CTRL – Out first. Then Mapping Formula, you change it to the Inverted Log Scale. Now reply to this on the…
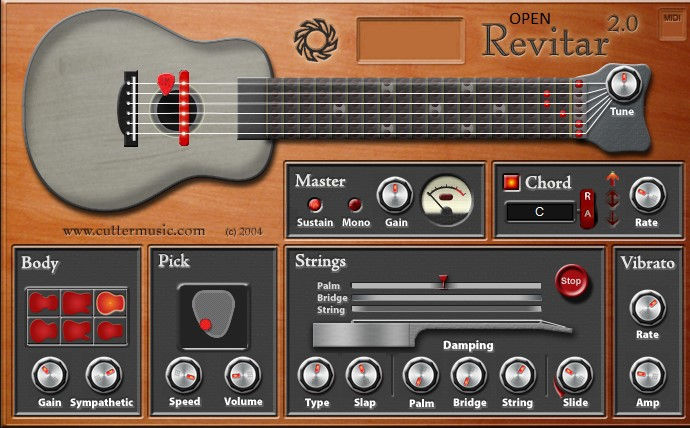
Revitar with its unique sound reproduction of any guitar is the ultimate buy for anyone. Well, it’s free from the makers of the plugin. You can get ultimate guitar sound, probably the leading edge in guitar sound. It has quite unique value as a guitar plugin and it’s kinda something realistic of different guitar types. Download: Revitar2.0 at loopswag.com
How to make that dank sound out of the fruity vocoder? You will need 1 — vocal, and 2. The carrier is the synth. To make the sound with ease, you need to pan your vocals to the right and the carrier to the left. Then send them separate to the right mixer unit. Just plot in a new unit in the mixer and toss a Fruity Vocoder in there. As in picture the mixer unit, five of them are right panned, which is vocal, and that one is linked to mixer unit 6. And mixer unit 4 is the…
With this arpeggiator, you most likely will have a cool arpeggiator sound of your instruments. To less fortune, people listening to the notes would be a cool thing if you run it on free mode. It can literally listen to your mind if you have music inspiration. Making the sound your mind uses. It’s cool tho. Download: Wheel of Fortune at loopswag.com
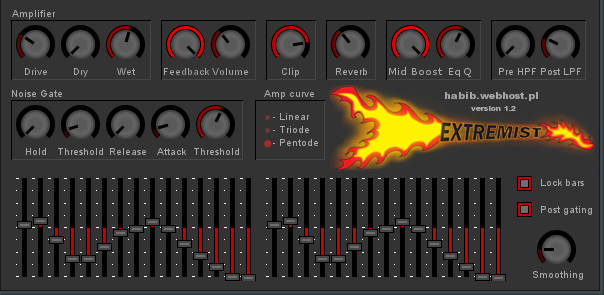
A distortion plugin with a heavy sound. Can be used mostly for anything called bass. Since it has great capacity. If you are eager to make your own preset, then this is a good tool. Download: Extremist at loopswag.com
Since you already don’t know the full length of the sound, a Creative SB1300 with Razer Kraken gives. It vibrates out for you the most changing frequencies at around 224Hz — Center at fullest refreshment for any producer to know the stake that is at that center. Somehow most producers are blinded at that range and can make a wrong move on either their bass or kick and even for other instruments. That can be annihilating to their production. There are always different prospects of about 224Hz centers. Many artists already EQ at that range on their master channel. Since…
Has it that dry sound? Well, you are familiar with Nexus. It has all only wet instruments. Meaning they have plugins which create an effect, and then increases less possibility to tweak the effects like reverb and delay. This means you can’t do anything to the effects you put on the sound. Dry sound is capable of delivering the precise sound of experience. Just Eq some, then gain with Fruity Limiter, as well as do some Fruity Waveshaper for distortion if you are able to manipulate the processing of distortion to any given bass. Well, it’s not all about having…
To denoise your vocals, it isn’t hard, but it’s necessary even to gain the sound levels, to also have the best possible source to use to put your effects on. Some results will not have a good quality based on the original recorded source, especially reverb, which does not sound right without denoising. So get down to business, open your projects with already placed vocals in its playlist. Then edit the file pushing slowly on the wave button on the left of each sample or you already perhaps have it in your Edison: It will open the Edison: For beginners,…
To record with FL 12, you have to set the right input for your soundcard. In ASIO settings The hard clip isn’t good since it will clip your sound hard and not reduce the amplification softly. That is often an issue with FL Studio Asio, so instead have that off. But remember to as well not set your input to way to high than you do deliver, make tests several times see what suits you. There is no problem recording -12dB vocals as you can gain around 15dB with Maximus and still have studio recording vocals out of them. Tip:…
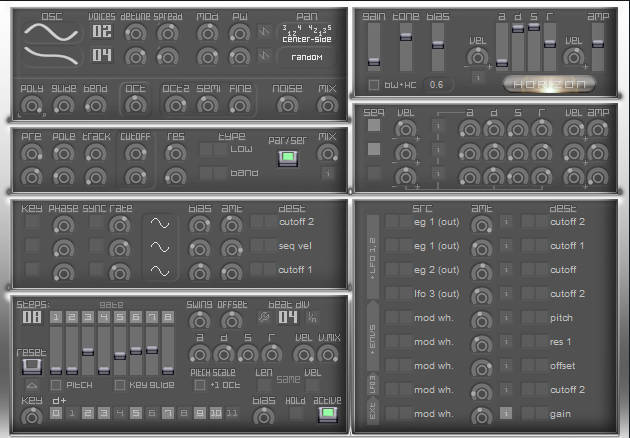
Has that cool sound of diverse processing. King of something you really need in your library. When tweaked you are surely delivering a good point of sound. And most producers need this surely. Download: horizon at loopswag.com
